§ Select Setup Tab then Inventory Tab.
§ Select the Add Inventory Link on the left navigation bar.
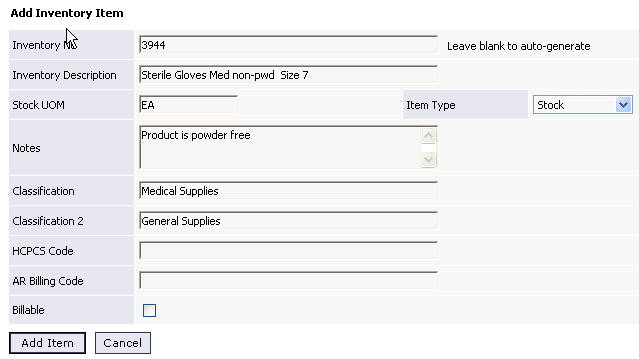
§ Input any necessary information you want to track about this product. (see below)
§ If you leave the Item number field blank, the system will auto-assign a product number based on your organization setup.
§ Select the Item Type: Stock, Non-Stock or Consignment
§ Click the Add Item Button to complete the initial setup.
§ Now that the initial item has been added to the inventory master, you must tie the product to a vendor(s) and facility / location(s) before you can reorder this product or manage par levels.
§ Continue to follow the step-by-step instructions to add vendors and inventory locations for this product.
![]() If you need to add many products at once, you can also use the Load Data Utility.
If you need to add many products at once, you can also use the Load Data Utility.

Click here to see Frequently Asked Questions.