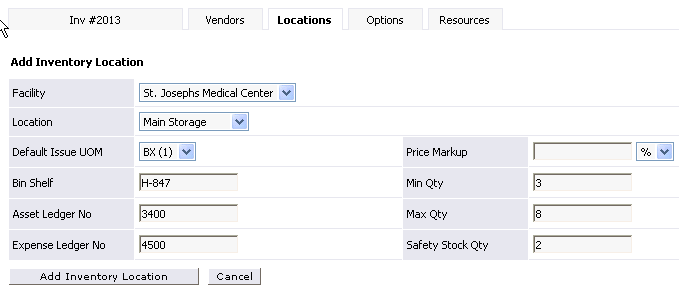
§ Select Setup Tab then Inventory Tab.
§ Select the product or search for a product with the Inventory Search Menu on the left navigation bar.
§ Once you’ve selected a product; select the Locations Tab for that product.
§ Now, click the Add Locations Button to begin the process of setting up an inventory location for this product.
§ Input the information specific to this product and location. (See below)
§ When you’re finished, select the Add Inventory Location Button.
§ Repeat these steps to add the product to additional inventory locations or use the Copy Button.
![]() If you need to complete many products at once, you can also use the Load Data Utility.
If you need to complete many products at once, you can also use the Load Data Utility.

Click here to see Frequently Asked Questions.